Monday, 15 July 2013

Loose the weight | Juice Detox Day 1


Lately I have been on a super big health kick, after trying numerous diets in the past I have hardly settled on one that has worked for me.
This week my boyfriend recommended the juice detox diet, He was starting it himself so I thought I would give it ago and join him, even though my will power is dreadful. This diet contains various fruit & Vegetable juices and fat free soups so basically a liquid diet.

So Today is Day 1 for me. I begun having a pint of water with lemon and a juice for breakfast. Up to now I don't feel hungry and feel quite satisfied. I am not an expert on diets or nutrition but for me, so far so good.

Recipe 1 | Breakfast : Fruit Juice
1 cup of strawberries
1 cup of pineapple
1 peach
Half Cucumber

Blend all into a blender and serve with ice. This is such a tasty juice and very filling.

Recipe 2 | Lunch : Spicy Vegetable soup
1 Carrot
half sweet potato
half onion
1 red chili ( including seeds)
2 full garlic cloves
1 celery
2 red peppers
1 fat free stock cube
tsp ginger | tsp chili sauce
basil leaves / salt / pepper
pinch sugar
tsp fat free tomato purée

Boil & Simmer for 30 Minutes and blend away.

So far this is all I have ate today, On this detox I would advise to still drink as much water as possible, can't give up the goodness!
Has anyone tried the juicing/liquid detox diet? How did you find it?

Friday, 12 July 2013

My week #1 | New month New start


//Cute little caterpillar in the garden//Pims and sunshine//Healthy eating starting with grapes//£1 neon nail polish//My beautiful necklace from my dad//Yummy oatcakes with light cheese spread and fruit//under £10 box sets, bargain//lovely picnic in robin hoods Sherwood forest


Thursday, 11 July 2013

Disappointing Makeup Products #2


Collection 2000 lasting perfection foundation - I first tried this foundation before the concealer became popular and I did actually like the consistency and colour of the foundation but lately I have noticed a change in the formula. This foundation has now become patchy, quite dry & lasts around a hour. This could be lovely on somebody else but I am really disappointed in this product, considering It could have been one of the best ones from the drugstore.

L'Oreal Paris Lumi Magique foundation - Having heard good reviews about this foundation, I thought I'd see what the big fuss was about. I honestly hated this foundation, everything about it felt wrong. It made my skin very oily (even though I have dry skin). I constantly looked shiny and my skin itched every time I wore it. It even broke me out in spots and blemishes every time I used it, I was desperate for it to be a good foundation so I tested it a few times just to be sure I wasn't having a bad skin day. Highly Annoyed and feel like it was a complete waste of money. 

Revlon nail polish 004 Blue Lagoon - How beautiful is the colour of this nail polish? Just a shame the constancy is horrible. This would have been one of my favourite colours to wear this summer. Everytime I have tried this polish it takes around half hour to dry, chips within a day & looks very messy if you don't apply it carefully  This would be perfect for someone who has time to do their nails rather than for someone who leads a busy life. This is defiantly not a go too polish for me.

Clinique face powder & brush - Looking for a new face powder and being persuaded by makeup artists on the beauty counter, I was excited to try my new powder. When I have used it over my foundation I have never felt like I have been wearing so much makeup in my life. It felt to heavy on my skin and it certainly didn't match my skin tone. I'm still desperate to use this powder as I feel it would be too much of a waste not to use. Has anybody tried this and have any tips? Id love to know.

Maybelline dream glow instant bronzing makeup - I adore my bronzer's & love having the bronzed healthy look to my skin. This caught my eye when I was looking through the fake tan section, having tried this on the back of my hand it looked quite pretty, so I made a little purchase. I don't like the smell of this product nor do I like the colour on my skin tone. I thought this would have been a lovely product for the summer & for holidays but It just didn't work for me. 

Wednesday, 10 July 2013

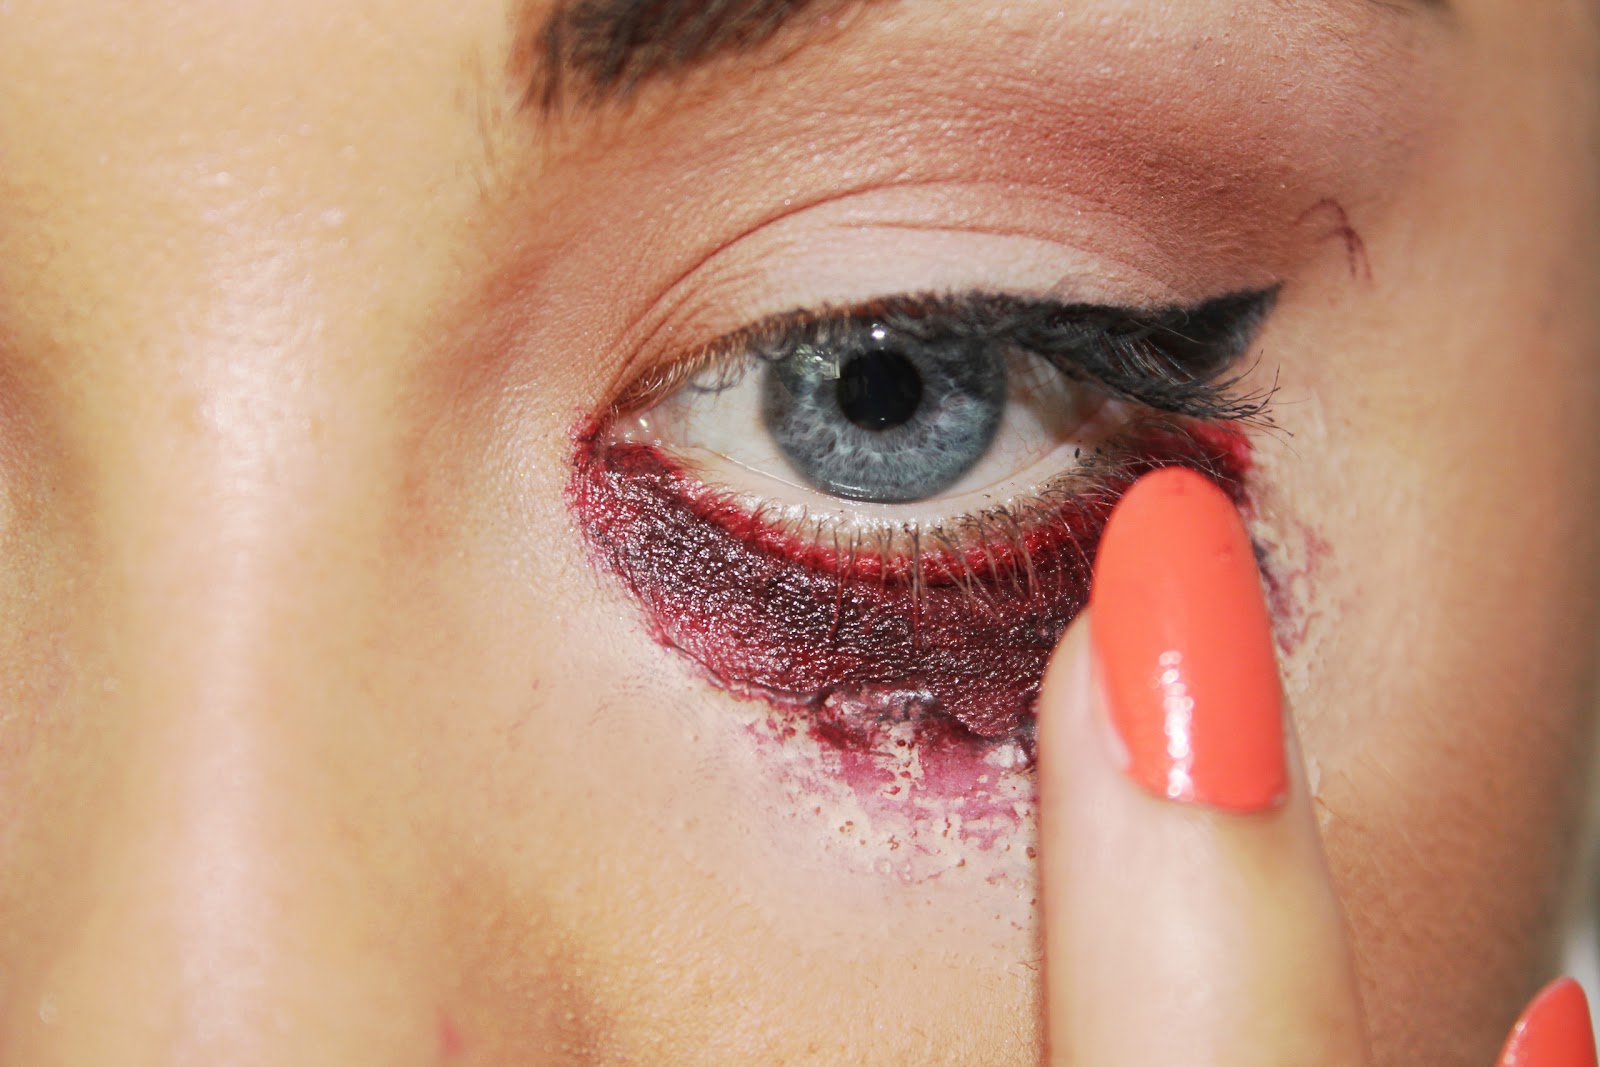
Special Effects | DIY | Eye wound

Hey everyone,  Hope your all okay. today I have a little makeup tutorial for you, Not your average makeup but something a little different, Hope you enjoy :)

Firstly make sure under your eye is clean ready for the latex
Using a old brush, Apply liquid latex under your eye. This is a strong pungent smell so the fumes could sting your eyes a little, If you feel like it's too strong, close your eyes while the liquid dries, then the smell will disappear. 
Next add a few layers of the latex, I have used around 3 layers and left each one to dry before applying the next coat. 
Once your latex has dried it will look similar to this. Use a matte powder over the top to make it less shiny and too stay in place. You can also add a little foundation to blend into the skin, This makes it more effective. 
As you can see the latex looks blended into the skin. Once all is dried, use tweezers or your nails to peal the top edge of the latex whilst using powder on the skin. 
When you have pealed back some of the 'skin' Add a red lipstick onto the skin, Here I used MAC Russian Red. You can use any face paint or lipstick to create this effect. 
Add some dark purple & black lipstick to the red, this will give the illusion of cut skin. You can also use various dark eyeshadows to create this look too. 
With your ring finger, Blend the colours together. Make sure your edges look blending into the skin to make it more of a real effect. 
Next is the fun part, The fake blood. Use a old brush and apply fake blood onto the 'cut'. With your tweezers peal the rest of the latex to give the illusion of torn skin. 
This is what the final result will look like and its super simple
You can mess about with the latex to make it bigger and bolder.
Finishing the look off with some dark shadows, give the eye a slightly bruised look. I used a blending brush for all of the shadows but you can use any.


Hope you enjoyed this pic-torial I have plenty of more coming soon :)

http://vonpixii.blogspot.co.uk/2013/03/special-effects-scar-tutorial.html - Learn how to do a Special Effects Scar