Hi Everyone, Sorry for a late blog post, I have been working on a special room with my mother, That it my new beauty room! I thought I would do a quick tour even though it's not fully completed as I am too excited to share ha ha! Hope you enjoy :)
Showing posts with label DIY. Show all posts
Wednesday, 27 November 2013
Monday, 12 August 2013
My week in makeup
I recently began ' My week in nails' but as I'm very lazy with them lately I thought I would switch it up and do My week in Makeup. Here are a few makeup looks I have been wearing this week, hope you like!
Wednesday, 10 July 2013
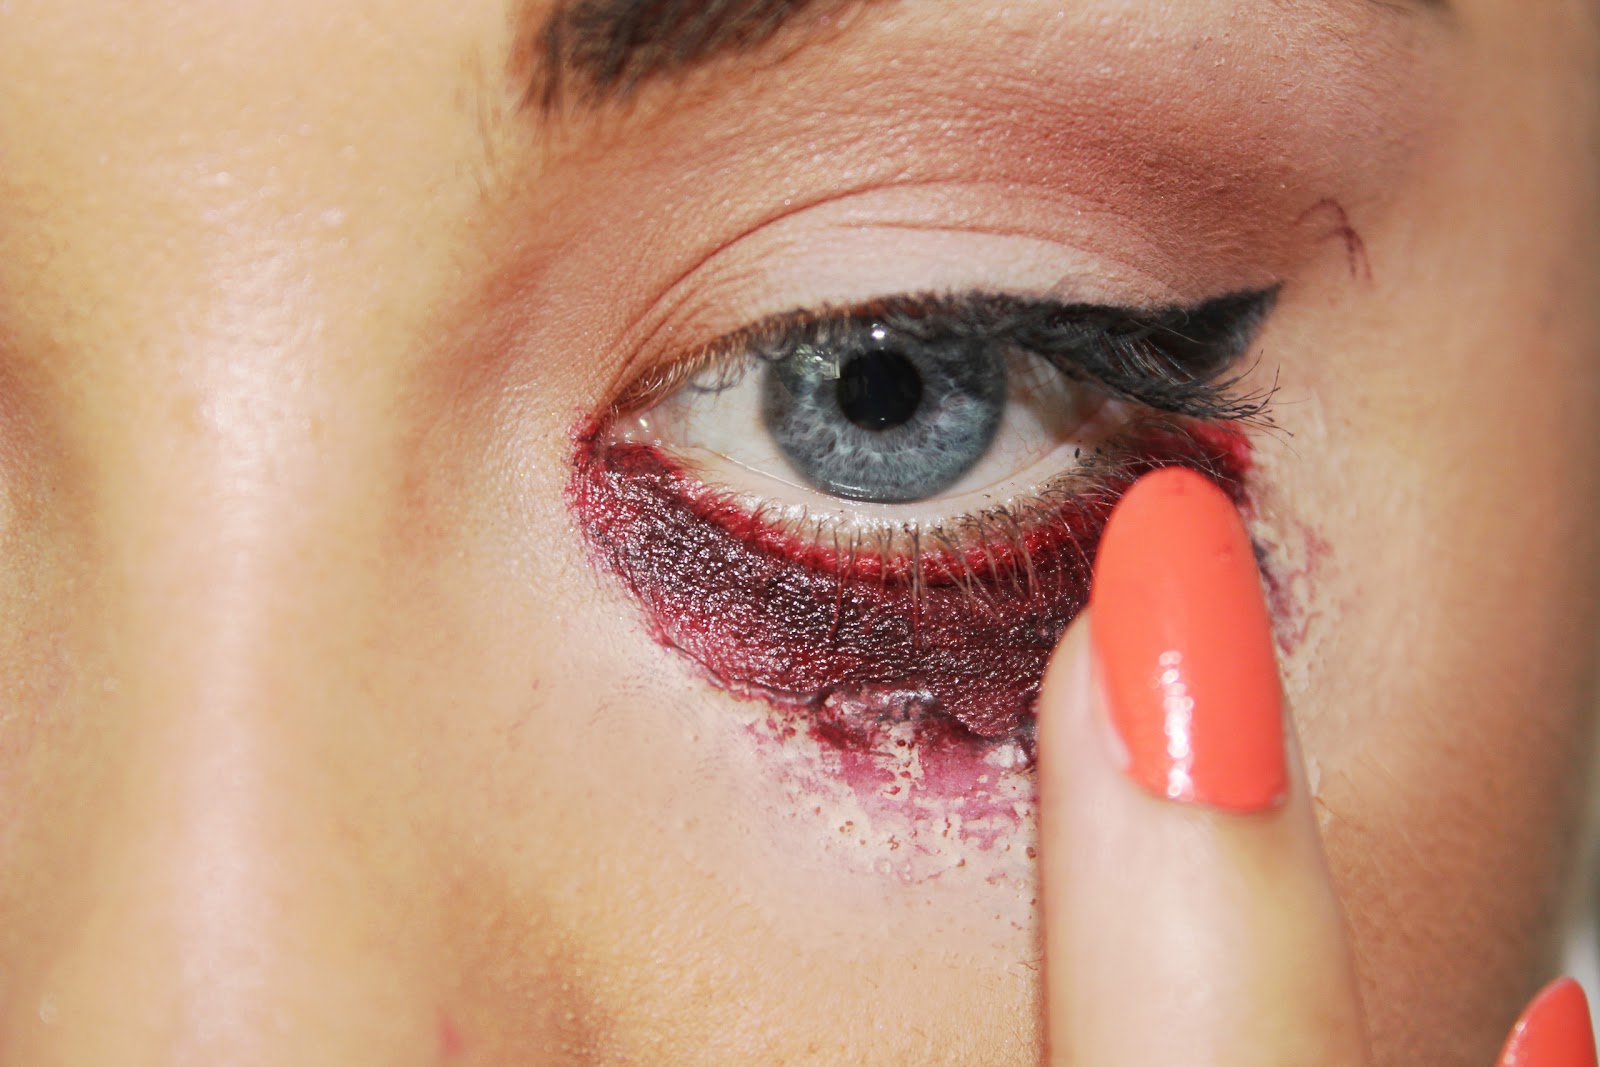
Special Effects | DIY | Eye wound
Hey everyone, Hope your all okay. today I have a little makeup tutorial for you, Not your average makeup but something a little different, Hope you enjoy :)
| Firstly make sure under your eye is clean ready for the latex |
| Next add a few layers of the latex, I have used around 3 layers and left each one to dry before applying the next coat. |
| As you can see the latex looks blended into the skin. Once all is dried, use tweezers or your nails to peal the top edge of the latex whilst using powder on the skin. |
| When you have pealed back some of the 'skin' Add a red lipstick onto the skin, Here I used MAC Russian Red. You can use any face paint or lipstick to create this effect. |
| Add some dark purple & black lipstick to the red, this will give the illusion of cut skin. You can also use various dark eyeshadows to create this look too. |
| With your ring finger, Blend the colours together. Make sure your edges look blending into the skin to make it more of a real effect. |
| Next is the fun part, The fake blood. Use a old brush and apply fake blood onto the 'cut'. With your tweezers peal the rest of the latex to give the illusion of torn skin. |
| This is what the final result will look like and its super simple |
| You can mess about with the latex to make it bigger and bolder. |
| Finishing the look off with some dark shadows, give the eye a slightly bruised look. I used a blending brush for all of the shadows but you can use any. Hope you enjoyed this pic-torial I have plenty of more coming soon :) http://vonpixii.blogspot.co.uk/2013/03/special-effects-scar-tutorial.html - Learn how to do a Special Effects Scar |
Saturday, 13 April 2013
DIY - Hair Chalk
So I recently Purchased some hair chalk from eBay , As I have seen this advertised everywhere for instant wash in and wash out colour, I defiantly was excited to try them. As a teenager I was forever dying my hair as many colours as possible so I think it's a brilliant idea to create instant colour without damaging your hair.
It is fun, inexpensive and you can be as experimental as you want so It's defiantly worth checking out!
I received a pack of 12 chalks ranging from red to blue to pink. Mostly My Favorite colours so you could imagine I couldn't wait to get stuck in.
Using hair chalk can be very messy so if your going to do it make sure you wear an old t-shirt and have plenty of wipes around! also use an old towel that you don't mind ruining ha ha.
Because I have fairly medium length hair, I decided to use the chalk on my hair extentions.
So to chalk your hair or extensions, these are the essentials you need. Cleansing or baby wipes, A comb, Hair clips, Straighteners and your chalk.
Section your hair into 2 or more depending on how thick you want the strand of hair to be. I used these clips to section and split the extensions into 2. Again this will probably depend on the length, style and quality of your hair.
Before you begin to chalk, make sure you condition your hair. It makes it extremely dry and can knot so be careful when brushing. Make sure you have a comb or brush on hand.
Take whatever chalk you are using and begin rubbing it onto the piece of hair. If you have darker hair then you should use a spritz of water, this will make the colour pop! You can go over the hair as much as you want, depending on how intense you would like the colour. Rotate the hair so you and get every strand!
If your only using one colour then you can leave it how it is, make sure after you have chalked to comb it.
If you decide to use a second colour like me then do the exact same, but make sure you blend those edges.
Once you have applied your chalk, Take your hair straighteners or curlers and go over the hair. This will make the colour stay extra long until you wash your hair. You can then add a little bit of hairspray. Be careful though, the chalk can make you hair super dry. Use either a oil or conditioner to make sure your protecting it.
And this is what the final result looks like! I decided to only use a little colour but you can be as intense as you want. It is such a simple and easy thing to do and you can be as creative as you want and use as many different colours! This lets you have a little change without wrecking your hair and having to re-dye it each time.
You can buy hair chalk here: http://www.ebay.co.uk/itm/190787580814?_trksid=p5197.c0.m619
Has anybody tried this? I would love to know your opinions :)
Thanks for reading
It is fun, inexpensive and you can be as experimental as you want so It's defiantly worth checking out!
I received a pack of 12 chalks ranging from red to blue to pink. Mostly My Favorite colours so you could imagine I couldn't wait to get stuck in.
Using hair chalk can be very messy so if your going to do it make sure you wear an old t-shirt and have plenty of wipes around! also use an old towel that you don't mind ruining ha ha.
Because I have fairly medium length hair, I decided to use the chalk on my hair extentions.
So to chalk your hair or extensions, these are the essentials you need. Cleansing or baby wipes, A comb, Hair clips, Straighteners and your chalk.
Section your hair into 2 or more depending on how thick you want the strand of hair to be. I used these clips to section and split the extensions into 2. Again this will probably depend on the length, style and quality of your hair.
Before you begin to chalk, make sure you condition your hair. It makes it extremely dry and can knot so be careful when brushing. Make sure you have a comb or brush on hand.
Take whatever chalk you are using and begin rubbing it onto the piece of hair. If you have darker hair then you should use a spritz of water, this will make the colour pop! You can go over the hair as much as you want, depending on how intense you would like the colour. Rotate the hair so you and get every strand!
If your only using one colour then you can leave it how it is, make sure after you have chalked to comb it.
If you decide to use a second colour like me then do the exact same, but make sure you blend those edges.
Once you have applied your chalk, Take your hair straighteners or curlers and go over the hair. This will make the colour stay extra long until you wash your hair. You can then add a little bit of hairspray. Be careful though, the chalk can make you hair super dry. Use either a oil or conditioner to make sure your protecting it.
And this is what the final result looks like! I decided to only use a little colour but you can be as intense as you want. It is such a simple and easy thing to do and you can be as creative as you want and use as many different colours! This lets you have a little change without wrecking your hair and having to re-dye it each time.
You can buy hair chalk here: http://www.ebay.co.uk/itm/190787580814?_trksid=p5197.c0.m619
Has anybody tried this? I would love to know your opinions :)
Thanks for reading
Friday, 12 April 2013
My week in nails!
Hey everyone
I thought I would begin a weekly post of 'my week in nails'. Since I like to give myself a few manicures a week, I thought I would share with you my easy on the go nails.
![]() |
| Plain White false nails - Ebay//Red Glitter - Barry m 150 |
| Products Used: No7 Stay Perfect Nail Colour - Jammy (Base) //Topshop Nail Art Pen - Hustle (white dots)//Topshop Clear star glitter(topcoat) |
![]() |
| Barry M Gelly HI-Shine Nail Paint - Lychee
Thanks for reading :)
|
Subscribe to:
Posts (Atom)


.jpeg)