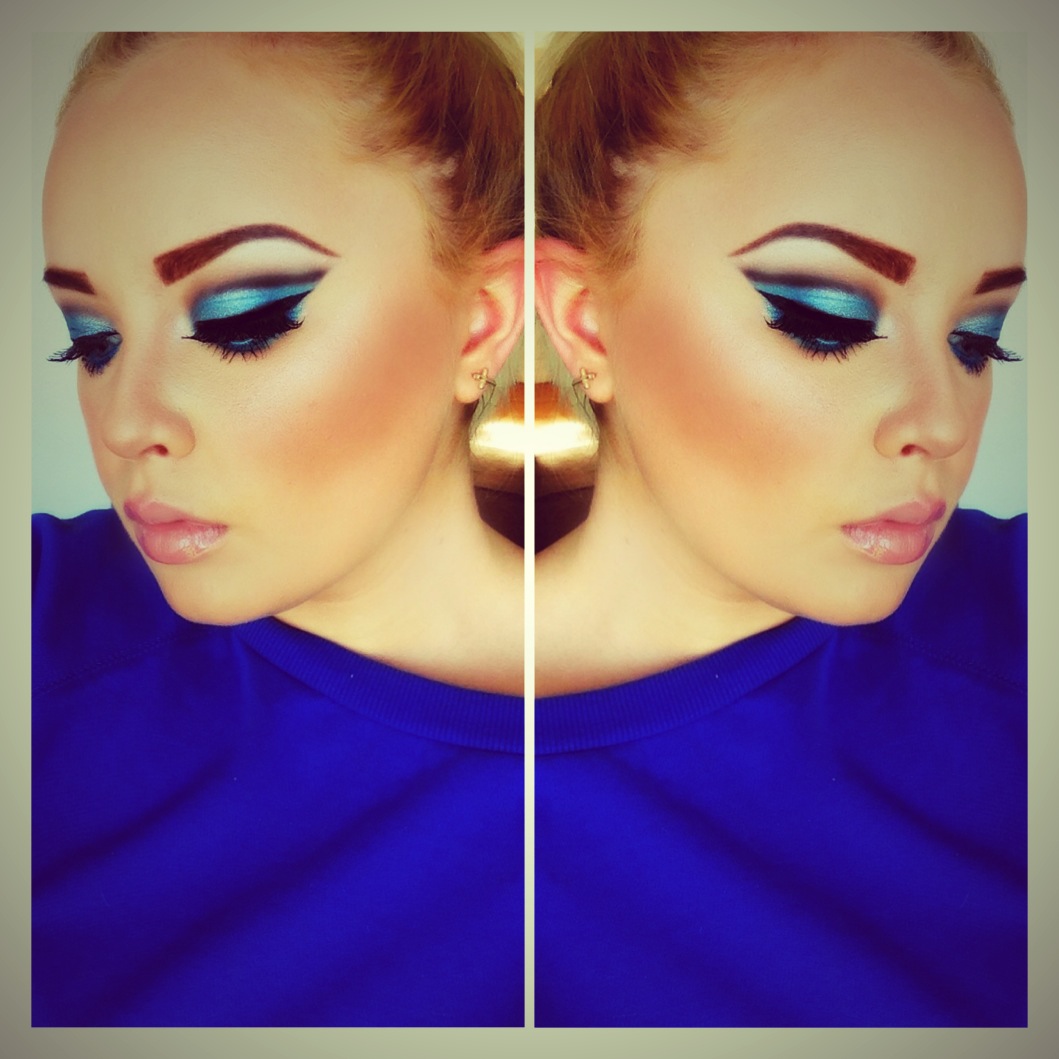
Hi everyone, so this year has been an absolute roller-coast for me. Having only begun my Blog this year and everything going on I have been left to feel somewhat lost in what I want within life and what I actually want to pursue.
For three years now I have self taught myself makeup, having begun a career in TV & Film Production Things lead into me wanting to pursue a career in something a little more practical, something that I have a passion for & something that I will never get bored of. Being the shy girl I am, working in TV Production was just not for me. Although I love that field of work and every aspect of it, I felt I needed to have a lot more confidence If I wanted to go far. That lead me onto teaching myself makeup. I practice every single day and 3 years down the line I can now tell my skills have massively improved. The whole passion for makeup is the reason I begun this blog, Not knowing what direction the blog was going I begun writing away about various subjects, mostly beauty and I begun feeling slightly disappointed with myself, It was not how I imagined my blog to be, My passion was makeup and I wanted to show what I could actually do rather than writing reviews on products I used. Again, I feel my confidence is the reason that's pulling me back from achieving my dream. All women suffer from bad insecurities, even if its something small. Having suffered from severe depression this year It has completely kicked me off track, I am trying to rediscover myself and my life and I feel like I am finally beginning to get somewhere, That is why I feel I should begin a new blog, something fresh and something that actually means good to me, something I can blab away on for hours sharing my passion and showing what I can do. This blog will show more makeup posts and the odd few lifestyle and I am finally ready to begin from scratch.
Thank you anyone who is following me & reads my blog and If any of you have a real interest for makeup like me then I'm sure you will enjoy this new revamp!
Here are a few makeup looks I have been creating to get myself on track...
If you have enjoyed this photos then I'm sure you will enjoy what's to come! :)
Showing posts with label tutorial. Show all posts
Tuesday, 8 October 2013
Tuesday, 17 September 2013
Purple Cut Crease Eye Makeup
Hey everyone, thought I would play a 15 second makeup tutorial that I filmed using Instagram. Hope you enjoy :)
Sunday, 4 August 2013
Wednesday, 10 July 2013
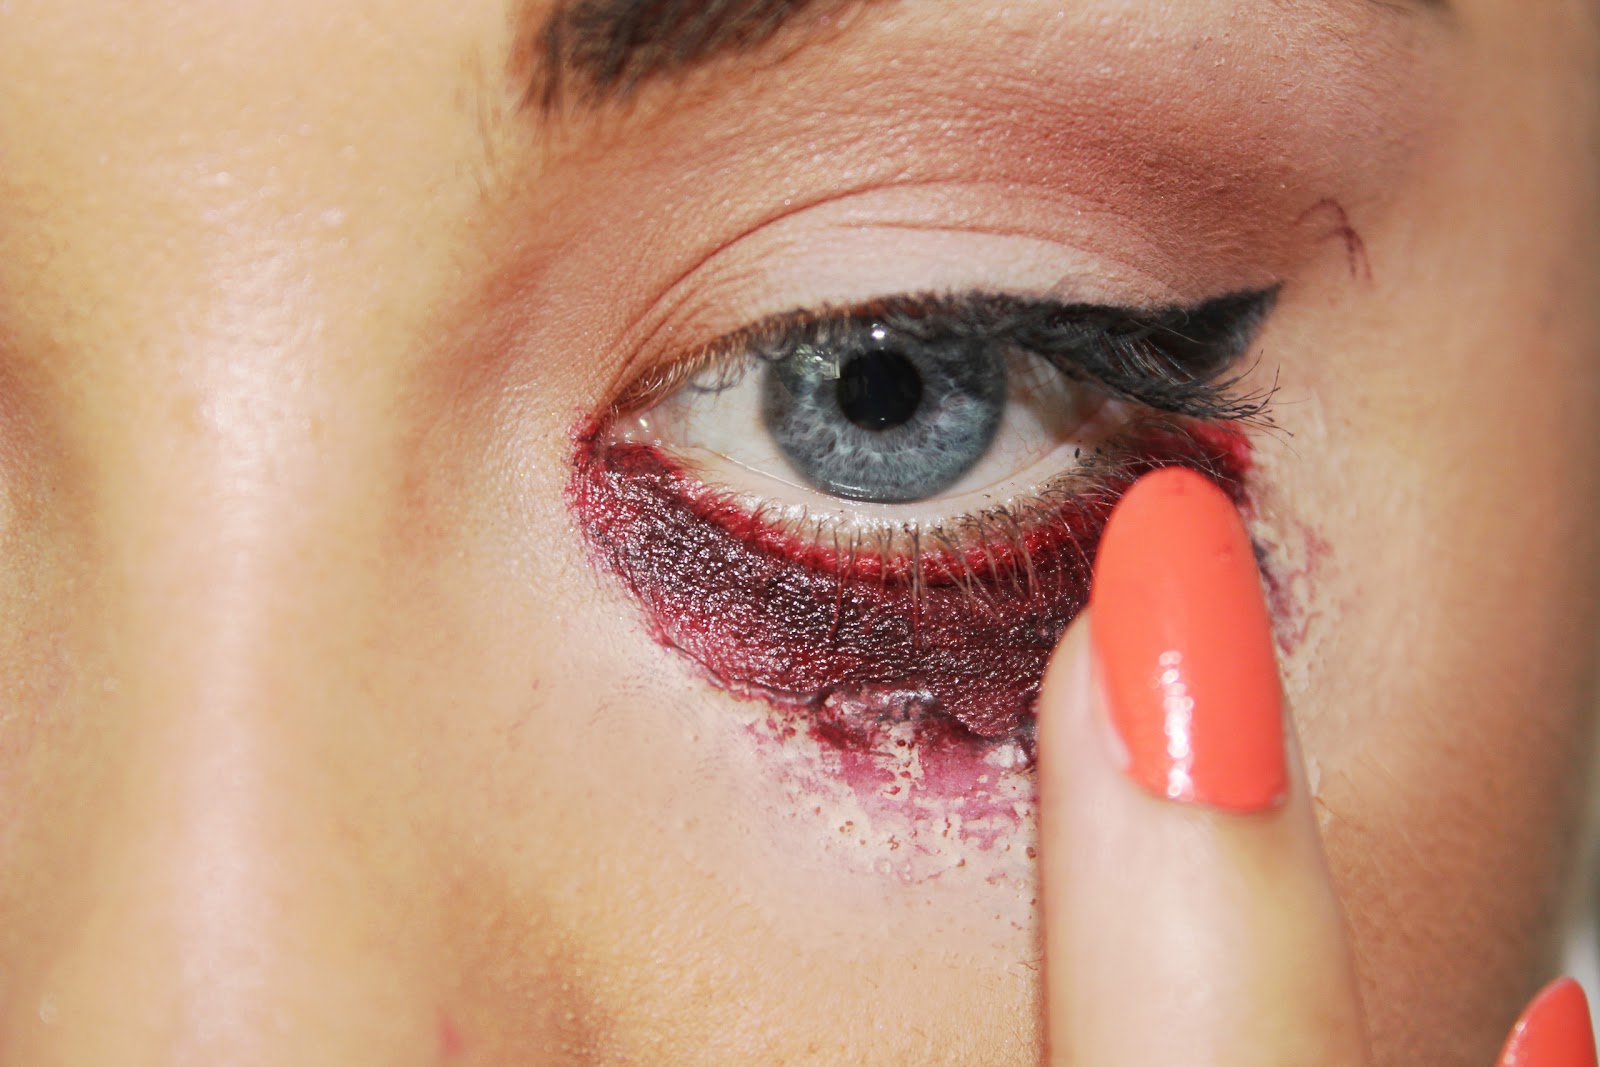
Special Effects | DIY | Eye wound
Hey everyone, Hope your all okay. today I have a little makeup tutorial for you, Not your average makeup but something a little different, Hope you enjoy :)
| Firstly make sure under your eye is clean ready for the latex |
| Next add a few layers of the latex, I have used around 3 layers and left each one to dry before applying the next coat. |
| As you can see the latex looks blended into the skin. Once all is dried, use tweezers or your nails to peal the top edge of the latex whilst using powder on the skin. |
| When you have pealed back some of the 'skin' Add a red lipstick onto the skin, Here I used MAC Russian Red. You can use any face paint or lipstick to create this effect. |
| Add some dark purple & black lipstick to the red, this will give the illusion of cut skin. You can also use various dark eyeshadows to create this look too. |
| With your ring finger, Blend the colours together. Make sure your edges look blending into the skin to make it more of a real effect. |
| Next is the fun part, The fake blood. Use a old brush and apply fake blood onto the 'cut'. With your tweezers peal the rest of the latex to give the illusion of torn skin. |
| This is what the final result will look like and its super simple |
| You can mess about with the latex to make it bigger and bolder. |
| Finishing the look off with some dark shadows, give the eye a slightly bruised look. I used a blending brush for all of the shadows but you can use any. Hope you enjoyed this pic-torial I have plenty of more coming soon :) http://vonpixii.blogspot.co.uk/2013/03/special-effects-scar-tutorial.html - Learn how to do a Special Effects Scar |
Saturday, 13 April 2013
DIY - Hair Chalk
So I recently Purchased some hair chalk from eBay , As I have seen this advertised everywhere for instant wash in and wash out colour, I defiantly was excited to try them. As a teenager I was forever dying my hair as many colours as possible so I think it's a brilliant idea to create instant colour without damaging your hair.
It is fun, inexpensive and you can be as experimental as you want so It's defiantly worth checking out!
I received a pack of 12 chalks ranging from red to blue to pink. Mostly My Favorite colours so you could imagine I couldn't wait to get stuck in.
Using hair chalk can be very messy so if your going to do it make sure you wear an old t-shirt and have plenty of wipes around! also use an old towel that you don't mind ruining ha ha.
Because I have fairly medium length hair, I decided to use the chalk on my hair extentions.
So to chalk your hair or extensions, these are the essentials you need. Cleansing or baby wipes, A comb, Hair clips, Straighteners and your chalk.
Section your hair into 2 or more depending on how thick you want the strand of hair to be. I used these clips to section and split the extensions into 2. Again this will probably depend on the length, style and quality of your hair.
Before you begin to chalk, make sure you condition your hair. It makes it extremely dry and can knot so be careful when brushing. Make sure you have a comb or brush on hand.
Take whatever chalk you are using and begin rubbing it onto the piece of hair. If you have darker hair then you should use a spritz of water, this will make the colour pop! You can go over the hair as much as you want, depending on how intense you would like the colour. Rotate the hair so you and get every strand!
If your only using one colour then you can leave it how it is, make sure after you have chalked to comb it.
If you decide to use a second colour like me then do the exact same, but make sure you blend those edges.
Once you have applied your chalk, Take your hair straighteners or curlers and go over the hair. This will make the colour stay extra long until you wash your hair. You can then add a little bit of hairspray. Be careful though, the chalk can make you hair super dry. Use either a oil or conditioner to make sure your protecting it.
And this is what the final result looks like! I decided to only use a little colour but you can be as intense as you want. It is such a simple and easy thing to do and you can be as creative as you want and use as many different colours! This lets you have a little change without wrecking your hair and having to re-dye it each time.
You can buy hair chalk here: http://www.ebay.co.uk/itm/190787580814?_trksid=p5197.c0.m619
Has anybody tried this? I would love to know your opinions :)
Thanks for reading
It is fun, inexpensive and you can be as experimental as you want so It's defiantly worth checking out!
I received a pack of 12 chalks ranging from red to blue to pink. Mostly My Favorite colours so you could imagine I couldn't wait to get stuck in.
Using hair chalk can be very messy so if your going to do it make sure you wear an old t-shirt and have plenty of wipes around! also use an old towel that you don't mind ruining ha ha.
Because I have fairly medium length hair, I decided to use the chalk on my hair extentions.
So to chalk your hair or extensions, these are the essentials you need. Cleansing or baby wipes, A comb, Hair clips, Straighteners and your chalk.
Section your hair into 2 or more depending on how thick you want the strand of hair to be. I used these clips to section and split the extensions into 2. Again this will probably depend on the length, style and quality of your hair.
Before you begin to chalk, make sure you condition your hair. It makes it extremely dry and can knot so be careful when brushing. Make sure you have a comb or brush on hand.
Take whatever chalk you are using and begin rubbing it onto the piece of hair. If you have darker hair then you should use a spritz of water, this will make the colour pop! You can go over the hair as much as you want, depending on how intense you would like the colour. Rotate the hair so you and get every strand!
If your only using one colour then you can leave it how it is, make sure after you have chalked to comb it.
If you decide to use a second colour like me then do the exact same, but make sure you blend those edges.
Once you have applied your chalk, Take your hair straighteners or curlers and go over the hair. This will make the colour stay extra long until you wash your hair. You can then add a little bit of hairspray. Be careful though, the chalk can make you hair super dry. Use either a oil or conditioner to make sure your protecting it.
And this is what the final result looks like! I decided to only use a little colour but you can be as intense as you want. It is such a simple and easy thing to do and you can be as creative as you want and use as many different colours! This lets you have a little change without wrecking your hair and having to re-dye it each time.
You can buy hair chalk here: http://www.ebay.co.uk/itm/190787580814?_trksid=p5197.c0.m619
Has anybody tried this? I would love to know your opinions :)
Thanks for reading
Friday, 22 March 2013
Special Effects - Small Wound Tutorial
Hey everyone!
This is my first special effects tutorial, I thought I would begin with a scar, very simple, quick and easy :)
| Once you have flatten you wax you can then squish it down onto your latex, It is a lot lighter than your skin tone so you need to blend the edges into your skin. |
| While using wax, Your best using a hand lotion to keep your hands moisturized, This will not only help the wax from sticking to your skin, it will also help you to blend those edges easier. |
| As soon as you have blended the edges into your skin, Use a baby wipe or a cleansing wipe to tidy up around the wax, It can be very messy and you want to make sure its smooth. |
| Blend your foundation onto the wax to give the illusion it is your real skin. Then take a skin colour powder and dab over, this will matte the wax and stop it from being shiny. |
| Using a sharp nail tool or then end of some tweezers, Make a small incision into the mold like this. You can then mess about and create the depth you want your wound or how big. You can get creative! |
Thursday, 14 March 2013
Glitter smokes
Hey Guys!
Today I have my first makeup pictorial! I love a glitter smokey eye so I thought I would share how do it, hope you enjoy! P.s Don't mind the numbers at the bottom of the photo, they got mixed up!
Firstly I begun by using a full coverage concealer to prime my eyelids, Using a small foundation brush I used this all over the lids.
I then took Mac's Eyebrow liner in 'stud' and roughly shaped my eyebrows, I never done them perfect because I will always end up shaping them later on.

I then took a flat top brush and a light concealer to shape underneath my eyebrows, This is important as it defines them into a better shape. Then use your favorite highlighter and use under your brow bone.

Use a black eyeshadow and blend into your crease, This does not have to be perfect!
Use a Gel liner over the top of the eyeshadow to create more definition, I used Collection black gel liner to create this look, Not only is it very pigmented it is easy to blend.
And your done! This is the final look, perfect for dinner or a night out!
Hope you all enjoyed!
thanks for reading :)
xx
Today I have my first makeup pictorial! I love a glitter smokey eye so I thought I would share how do it, hope you enjoy! P.s Don't mind the numbers at the bottom of the photo, they got mixed up!
Firstly I begun by using a full coverage concealer to prime my eyelids, Using a small foundation brush I used this all over the lids.
I then took Mac's Eyebrow liner in 'stud' and roughly shaped my eyebrows, I never done them perfect because I will always end up shaping them later on.
I then took a flat top brush and a light concealer to shape underneath my eyebrows, This is important as it defines them into a better shape. Then use your favorite highlighter and use under your brow bone.
Use a black eyeshadow and blend into your crease, This does not have to be perfect!
Use a Gel liner over the top of the eyeshadow to create more definition, I used Collection black gel liner to create this look, Not only is it very pigmented it is easy to blend.
Roughly wing out your liner, this does not have to be neat, you can always redo and touch up later on. I then took a glitter gel liner again by collection and covered the lid.
I then took fearne cottons glitter pot in silver and placed it over the glitter gel liner, this helps it to stay on longer and give it that extra sparkle.
Using a baby wipe or a cleansing wipe, Clean up under the eye and sharpen up your liner.
Once you have cleaned up, Take a blending brush and blend the top of the gel liner to make it smoother rather than a harsh line.
Take your favorite concealer and conceal under your eyes and above your eyebrows. I used collection 2000 lasting perfection concealer, My favorite for under the eyes.
Keep blending the liner until your happy with the outcome, Then take your mascara and coat your lashes before the falseys!
Put some lash glue on your lashes and wait till tacky, I used naturals for this look.
Once applied, again go over your lashes with a mascara, this will blend your own lashes with the false ones. Make sure you go from the root!
I then took my glitter liner and topped the lid up for extra sparkle!
Products Used
thanks for reading :)
xx
Subscribe to:
Posts (Atom)